Speedrunning a Mech Interp Research Setup (Remote GPU, Torch, TransformerLens, Cuda, SSH, VS Code)
I genuinely think this is the fastest way to get set up on a brand-new mech-interp project. It takes you from nothing to a fully working remote GPU dev environment (SSH, VS Code/Cursor, CUDA, PyTorch, TransformerLens, GitHub, and UV) with as little friction as possible. It’s exactly the setup I wish I’d had when starting new projects, and it’s especially handy if you’re working on projects for a Neel Nanda’s MATS stream application and just want to get to research, not infrastructure.
This guide is especially well-suited for:
People starting a brand-new mechanistic interpretability project who want to go from “nothing on a machine” to a working research environment as fast as possible.
Researchers or students in (or preparing for) projects from Neel Nanda’s MATS stream, where a clean, reproducible setup and fast iteration really matter.
Anyone with basic Python and Git experience who doesn’t want to spend half a day fighting CUDA, drivers, and environment managers.
Quick disclaimers before we start: this setup uses a paid cloud GPU provider, and you will be billed while the machine is running. I’m not affiliated with any provider in this guide. Also, this is a practical tutorial, not a security-hardened production setup. It’s intended for research and personal development use.
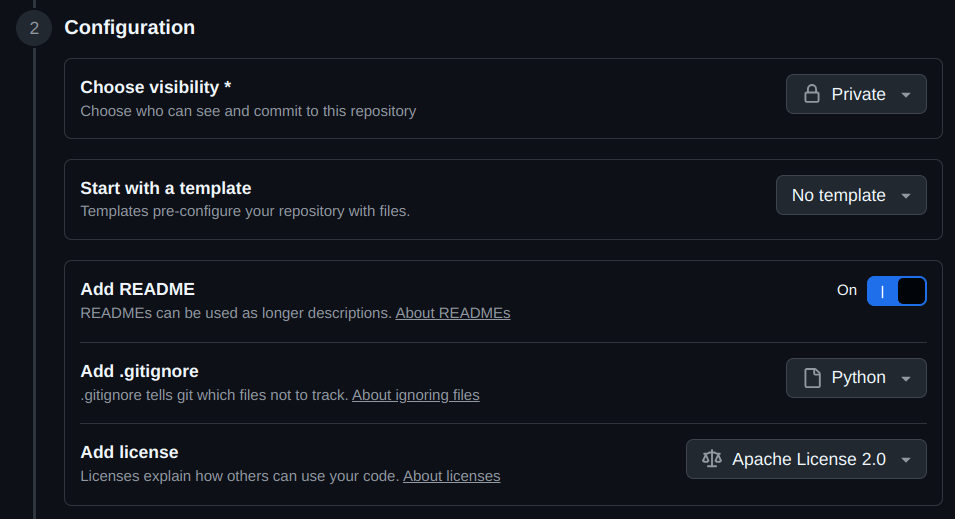
1. Create your GitHub repo
Begin by creating your new repo, I recommend this config:
2. Spin up your GPU
I recommend Nebius as a compute provider—super cheap, easy to use and you can stop your GPUs without deleting them which saves you money!
Start by creating an account on the Nebius AI Cloud and click the purple “Create virtual machine” button in the “Virtual machines” tab.

I recommend all the default setup except:
Preemptible
H100 or H200 (at least 80GB GPU memory)
Public IP Address → Auto assign static IP
This will ensure that if you stop and start the instance, it has the same static IP and you won’t need to change your .ssh config each time!
Access: Add an ssh key
On your local machine run the following command to create your private key “nebius_local” and your public key “nebius_local.pub”:
ssh-keygen -t ed25519 -f ~/.ssh/nebius_local -C "your_email@example.com″You may also need to run this if on Mac:
ssh-add ~/.ssh/nebius_localView the public key and copy it to the clipboard
cat ~/.ssh/nebius_local.pubWhich will print one line to terminal: ssh-ed25519 ABCD… identifier
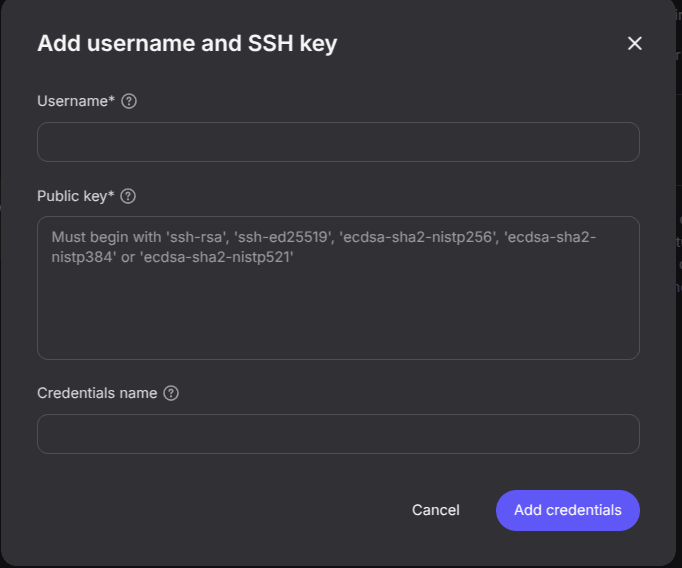
Copy what it printed and add it as an ssh key. You can choose your username, we’ll call it $USERNAME.
Click “Create VM” and fill in any billing information it requests:

3. SSH into your GPU
Once your GPU is “Running” you should be able to retrieve a the Public IPv4 address and copy it to clipboard. We’ll call this $PUBLIC_IP

On your local machine run:
ssh $USERNAME@$PUBLIC_IPFor me this looks like:
ssh jrosser@59.190.71.41If you get a fingerprint message, say “yes”! Eventually you should be in! Typing “exit” will end your session.
If anything has gone wrong at this point, ask claude code, or:
sudo systemctl restart sshAnd if that doesn’t work, check that you copied your ssh-key in correctly! Try adding or removing a newline at the end.
If all else fails you may want to delete the VM and start up a new one.
4. Connect VSCode (or Cursor) to your GPU
Now that you ssh is working, let’s connect to it from Cursor.
On your local terminal edit your ssh config and at the end add your VM as a host:
sudo nano ~/.ssh/configand add your VM’s $PRIVATE_IP and $USERNAME in this format to the end of the file:
Host nebius-vm
    HostName 59.190.71.41
    User jrosser
Open VSCode/Cursor and click the blue “Open a remote window” button in the bottom left:
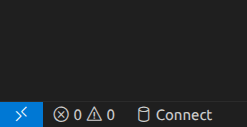
And from the list select “Connect to Host”
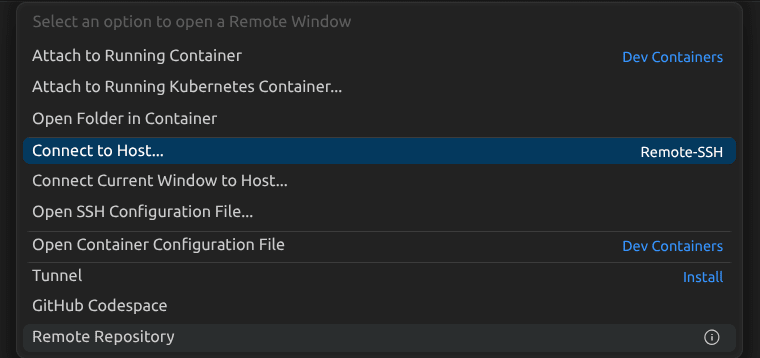
and select “nebius-vm” from the list.
It should take a minute or so to open the remote.
5. Install your environment super quick! (cuda + torch + transformerlens and more!)
5.1. Create a GitHub SSH key on your remote terminal and upload that to github[1]
In your remote terminal in your IDE, create a new .ssh key:
On your remote machine run the following command to create your private key “nebius_remote” and your public key “nebius_remote.pub”:
ssh-keygen -t ed25519 -f ~/.ssh/nebius_remote -C "your_email@example.com″View the public key and copy it to the clipboard
cat ~/.ssh/nebius_remote.pubWhich will print one line to terminal: ssh-ed25519 ABCD… identifier. Copy what it printed.
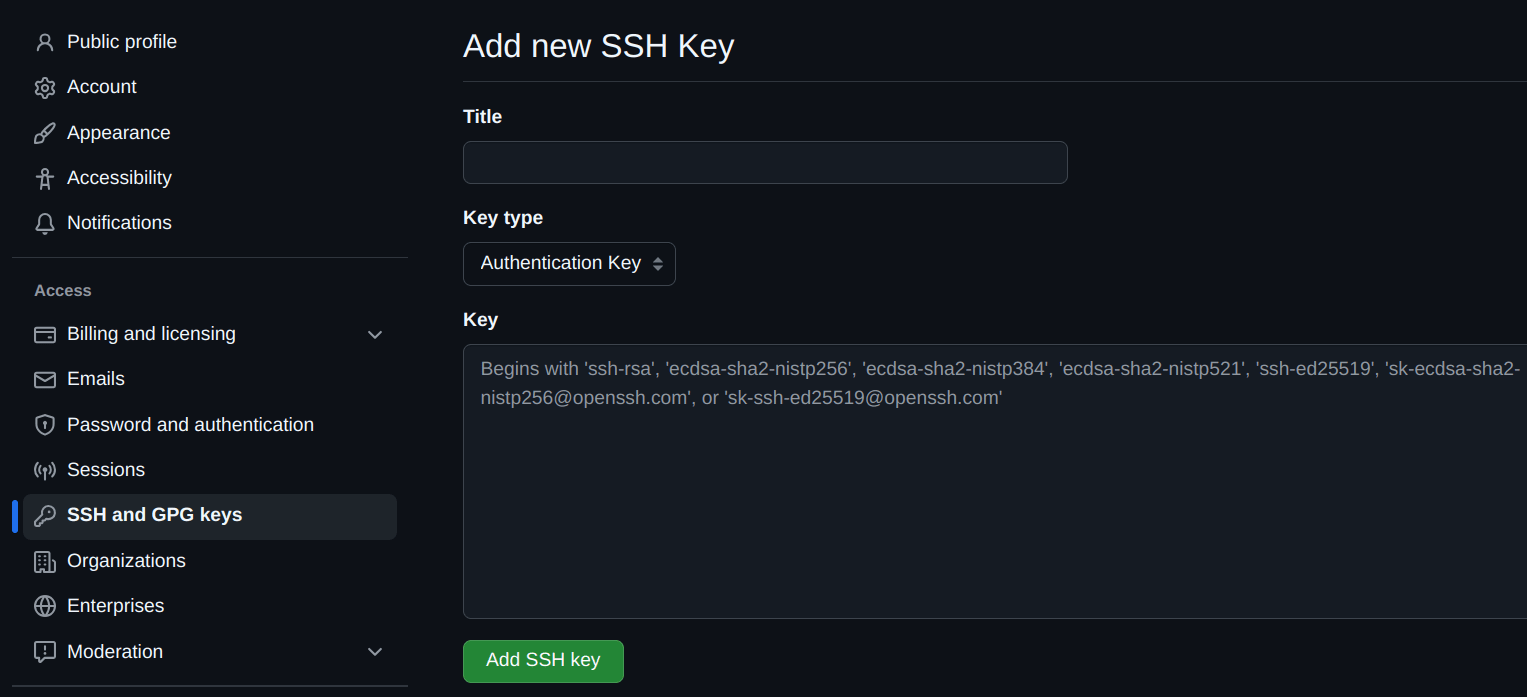
Navigate to the SSH and GPG keys section of your GitHub profile settings. Quick link.
Add the copied nebius_remote key as an ssh key on github.
5.2 Some minimal git config setup so you can clone via ssh
Run these four commands in your remote terminal, one by one:
git config --global user.name “Your Name”
git config—global user.email “your.github.email@example.com″
eval “$(ssh-agent -s)” && ssh-add ~/.ssh/nebius_remote
ssh -T git@github.comAfter this your expected output would be “Hi <username>! You’ve successfully authenticated...” showing that it’s all working :)
5.3 Navigate to your github repo and get the ssh clone command
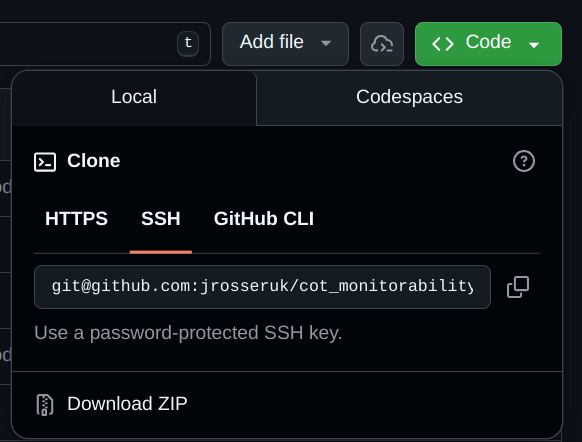
In your remote terminal type “git clone” and then copy in the command you copied from the github repo:
git clone git@github.com:$GITHUBUSERNAME/$GITHUBREPONAME.gitThen in VSCode/Cursor, use “Open Folder” to navigate into that folder.
5.4 Install your whole environment using UV
Aside: why are we using UV? Why not conda?
If you have used conda before, you’ll relate to it taking 20mins+ to install torch sometimes. UV seems to install everything on a Nebius H100 in under a minute! It’s also just much cleaner and creates an easily reproducible environment but that’s for another time!
Begin by installing “uv” by running this in your remote terminal.
curl -LsSf https://astral.sh/uv/install.sh | shThen run
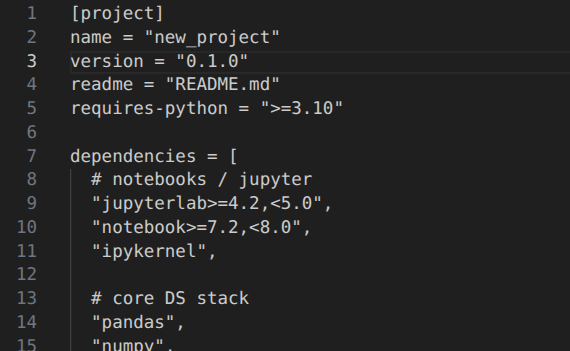
uv init --python 3.10Then edit the file “pyproject.toml” that was created and replace the contents with this file (or find it here: https://jrosser.co.uk/#resources ) which I made to contain all the dependencies one might need, it should look like this
Then run
uv syncIt should create a .venv environment that you can activate in your remote terminal via:
source .venv/bin/activateAnd you can run this to check that torch can find the GPU:
python -c "import torch; print(torch.cuda.is_available())"Should return “True”.
And that’s it! Go forth and save the world!
6. Stopping your VM
Once you’re done for the day, don’t forget to stop your VM so you won’t be charged for using it overnight (unless you want something to keep running!)
You can do this on Nebius, but not on other providers!
Bonus!
Given you’re working on a single VM, you may just want to completely refresh your GPU e.g. to resolve unexplained OOM errors. Just run this—beware it will kill all python processes currently running (which is normally fine!)
pkill -9 pythonAlso, if you want to use claude code, simply run this on your remote terminal
curl -fsSL https://claude.ai/install.sh | bash- ^
For a more secure setup, use a deploy key which only gives access to a single repo: https://docs.github.com/en/authentication/connecting-to-github-with-ssh/managing-deploy-keys
How much of the web stuff can be done through terminal API? That was always a large chunk of the faff for me, and also seems like the biggest barrier between my previous experiences and “Claude, spin me up a GPU”.
Overall, the setup looks good, except for one part: I wouldn’t give the remote machine complete access to your GitHub account.
I think maybe a better solution would be to set up a bare repository on the Nebius VM. This serves a second remote repository you can push to from your machine. After you push to the bare repository, you can clone it while only on the Nebius VM to another location on the VM. You can make changes in this second location, then push to the bare repository, which you can pull to your machine, and ultimately push to GitHub.
It is a bit more complicated than just directly pushing to GitHub, though. Maybe someone else knows a simpler solution.
+1 to this!
Maybe a neat solution might be to instead use a deploy key (gives read/write access just to one repo) instead of adding a full ssh key?
https://docs.github.com/en/authentication/connecting-to-github-with-ssh/managing-deploy-keys